What if your view did most of the selling? On Jupiter Island, buyers arrive expecting privacy, indoor–outdoor living, and editorial-quality presentation. When you stage with a designer’s eye, you elevate the water, the light, and the craftsmanship that make your estate rare. This guide shows you how to stage for scale, texture, sightlines, and view framing, choose coastal-durable materials, and coordinate photography for cinematic results. Let’s dive in.
Why design-led staging matters
Luxury buyers here want turnkey presentation, lifestyle clarity, and high-caliber imagery. Staging for Jupiter Island is not about filling rooms, it is about revealing water, proportion, and flow. Your final look should feel natural in person and read beautifully on camera. When you get those elements right, you support pricing and shorten marketing time.
Plan for coastal light
Coastal light on Jupiter Island is bright, with salt haze and long daylight hours. Morning and late afternoon are ideal for warm, inviting interiors, especially on east-facing oceanfront rooms. Intracoastal orientations vary, so plan around sun angles to reduce glare and preserve water detail in photos. Keep window treatments minimal, using sheers that soften light while keeping views open.
Get scale right
Large rooms and high ceilings demand appropriately scaled furniture. Anchor seating areas with wide rugs and sectional groupings that define conversation zones without blocking views. Choose oversize coffee tables and lighting that read proportionally in big volumes. Favor low, wide art that complements horizontal vistas rather than tall pieces that interfere with sightlines.
Layer texture, protect materials
Texture brings depth on camera and warmth in person. Combine linen, wool, sisal, rattan, and bleached wood with refined finishes like leather, brushed metals, and glass. In coastal conditions, prioritize marine-grade fabrics, powder-coated aluminum, treated teak, and sealed stone. Store delicate textiles during humidity spikes or storm advisories, and select corrosion-resistant lighting and décor for areas exposed to salt air.
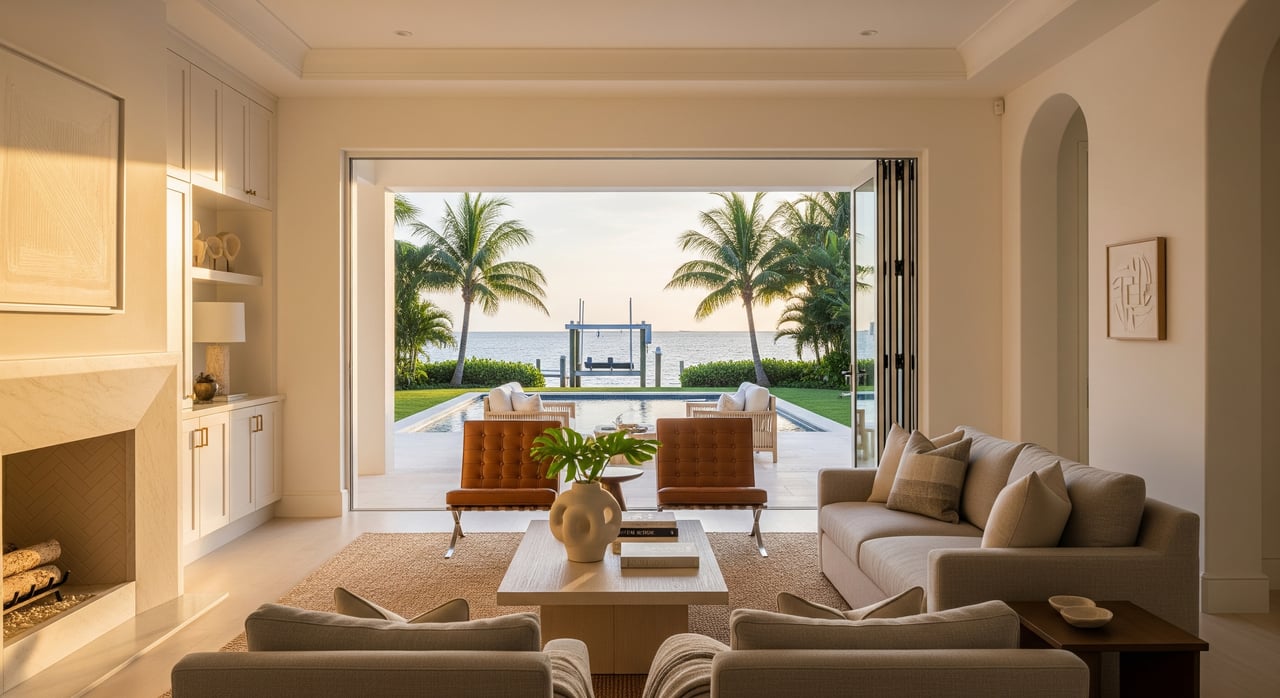
Preserve sightlines and frame views
Treat each window and terrace like a picture frame. Keep primary circulation paths clear and avoid tall pieces that interrupt the eye’s path to the water. Use low-profile seating and inward-facing groupings that pull attention to the horizon. Keep accessories restrained so the view remains the star.
Room-by-room tactics
Great rooms and living
- Position seating to face the water and maintain easy conversation.
- Use wide rugs with front legs of furniture anchored for scale.
- Keep art horizontal and proportionate to wall planes to support the panorama.
Dining and entertaining
- Center the dining table as an anchor, set with minimal, elegant place settings.
- Use a scaled runner or single low centerpiece that does not compete with exterior views.
- Highlight indoor–outdoor flow by aligning chairs and sightlines toward terraces.
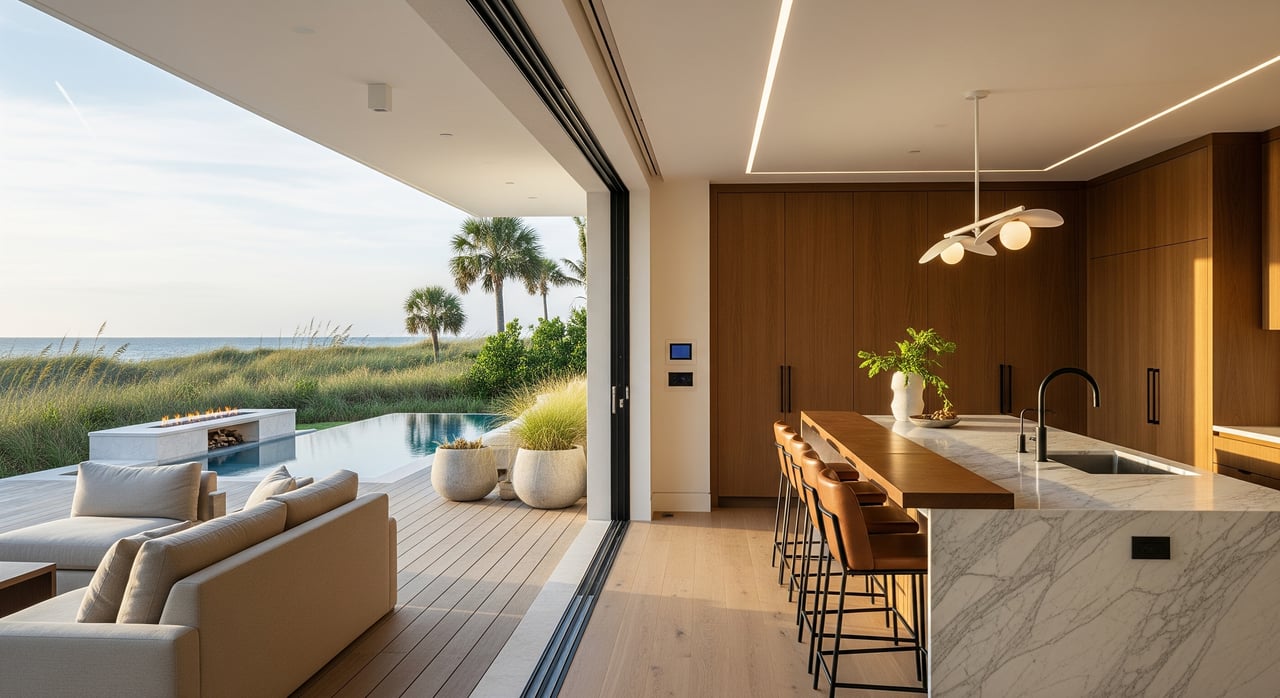
Kitchens
- Keep counters clear except for a few functional, curated items like citrus or servingware.
- Select island pendants sized to read as architectural elements in photos.
- Maintain open views from the cooking zone in open plans.
Primary and guest suites
- Dress beds with layered neutrals: a base cover, duvet, and a single textured throw.
- Use bedside tables and lighting scaled to headboards and room height.
- Keep window dressings light to preserve daylight and the view emphasis.
Outdoor living
- Stage multiple uses: a dining zone, a lounge set, and a quiet reading spot.
- Keep thresholds clean and visually seamless to reinforce indoor–outdoor flow.
- Use marine-grade fabrics and treated woods; remove soft goods when not in active use.
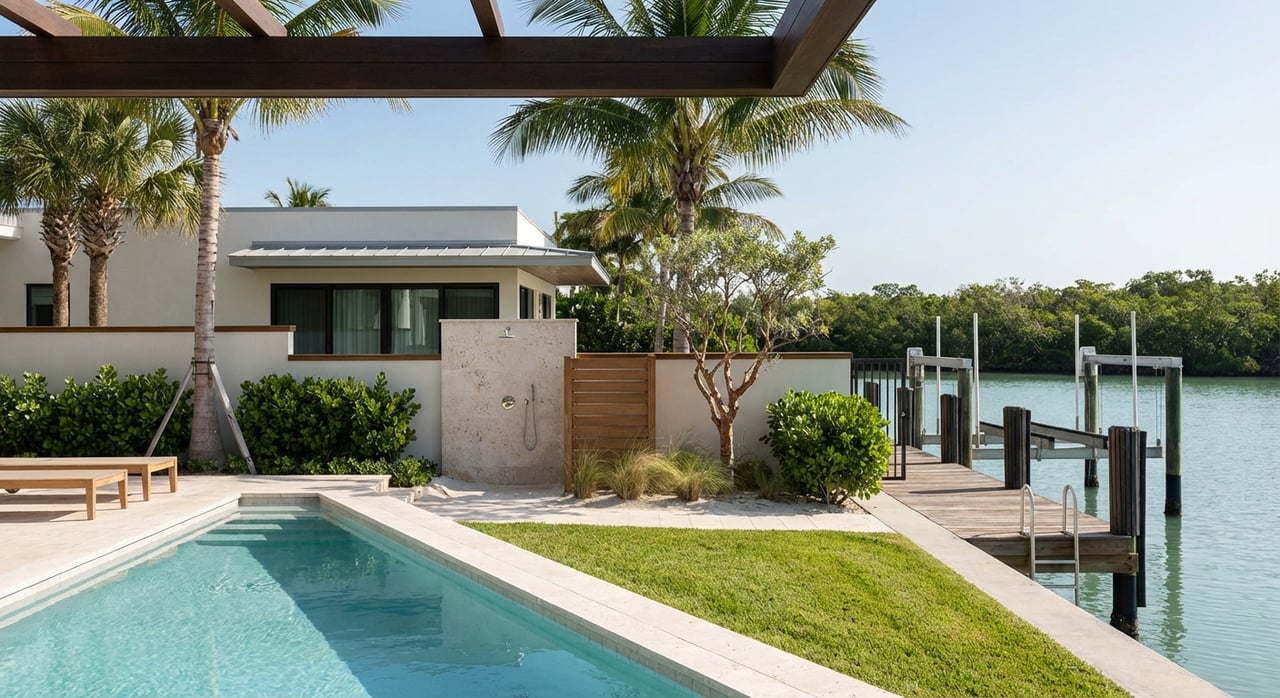
Waterfront and docks
- Present docks and boathouses with clean lines and essential equipment only.
- Emphasize safe, easy water access with clear paths and good lighting.
- Align seating to frame the water without cluttering the approach.
Coastal-durable selections
Choose materials that can handle humidity and salt air without sacrificing elegance. Marine-grade solution-dyed acrylics, treated hardwoods, and powder-coated metals perform well outdoors. Indoors, washable slipcovers and stain-resistant rugs simplify resets between showings. Favor stainless or marine-grade alloys for fixtures exposed to exterior conditions.
Color palette that sells
A restrained palette lets water and light lead. Start with warm or cool whites, sandy beiges, and muted grays. Add intentional coastal accents like sea-glass greens, deep navy, or driftwood tones. Keep color moments editorial and sparse so they guide the eye rather than distract.
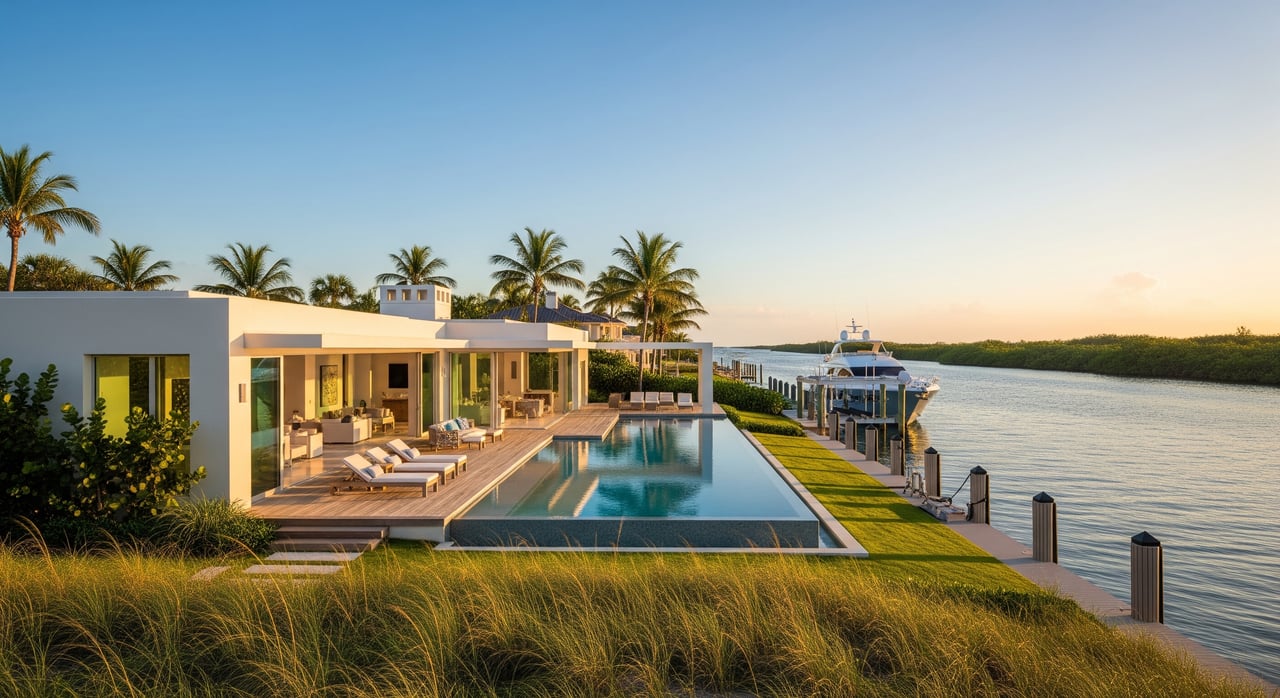
Cinematic photography plan
High-production visuals are essential for coastal estates. Aim for a mix of aerials, golden-hour interiors, and twilight exteriors to convey privacy, orientation, and ambiance.
- Aerial and drone: Establish the property’s relationship to ocean or Intracoastal, docks, and outdoor amenities.
- Golden hour: Capture interiors when warmth and view detail are balanced.
- Twilight: Showcase pool glow, exterior lighting, and seamless indoor–outdoor continuity.
- Editorial details: Texture close-ups and lifestyle vignettes that support a magazine-level narrative.
- Floorplan and virtual tour: Help buyers understand scale and flow beyond stills.
Coordinate the shoot
Create a prioritized shot list tied to staging goals: great room framing the water, primary suite at dawn, terrace at twilight, detail textures. Deliver and finalize staging at least a day before photography to allow cleaning and lighting tests. Use warm, dimmable fill lighting to balance interiors against bright exteriors. Confirm drone permissions and any community rules in advance.
Editorial styling and post
Editorial styling uses fewer, more intentional props and a controlled palette. Keep scenes authentic, from a single coffee setup to a quiet chaise by a window. In post-production, balance highlights on the water and interior shadows without overblown HDR. Maintain realistic color, especially in twilight sequences.
Video and short-form
A 30–90 second cinematic cut can boost engagement. Use smooth gimbal work, sequences that move from interior to exterior, and morning-to-evening transitions. Align video vignettes with key staged moments so everything reads as one story.
Timeline and checklist
Pre-staging assessment (1–2 weeks out)
- Measure rooms and ceiling heights; note key view axes and repairs.
- Decide what to keep, replace, or rent; plan storage for owner items.
- Confirm access windows, island rules, and parking for crews.
Install (1–3 days)
- Place primary rooms first: great room, primary suite, main terrace.
- Final clean, light scent only; align color temperatures across fixtures.
- Safety-check exterior stairs and elevated entries; ensure clear, lit access.
Shoot day and launch
- Walk through with the photographer; review the shot list.
- Stage fresh items last minute: flowers, citrus.
- Schedule separate twilight and drone sessions if needed; confirm permissions.
Showings and maintenance
- Create a quick reset checklist: pillows, terrace sweep, towel removal.
- Assign a maintenance contact for frequent tours.
- Remove exterior soft goods ahead of storms; store and reset as weather allows.
Avoid common pitfalls
- Underscaled furniture makes grand rooms feel empty; size up.
- Clutter and tall décor interrupt sightlines; keep the view primary.
- Mixed lighting temperatures read poorly; standardize warm tones.
- Outdoor props left out during storms risk damage; have a removal plan.
- Unplanned drone use can violate rules; confirm pilot certification and permissions.
Partner with a design-led team
When you align staging, materials, and photography with Jupiter Island’s light and lifestyle, you produce imagery and experiences that move buyers. If you want a hands-on, design-informed plan that highlights scale, protects finishes, and captures cinematic visuals, connect with a local team that does this every day. To discuss a tailored staging and marketing strategy for your estate, reach out to Susan Turner.
FAQs
What is design-led staging for Jupiter Island estates?
- A designer-driven approach that prioritizes scale, texture, sightlines, and view framing to showcase water, light, and craftsmanship in person and in photos.
How do I choose durable coastal materials for staging?
- Select marine-grade fabrics, treated hardwoods, powder-coated metals, sealed stone, and corrosion-resistant fixtures; store delicate textiles during humidity spikes.
When is the best time to photograph oceanfront rooms on Jupiter Island?
- Morning or late afternoon typically offers warm light and reduced glare, helping interiors and water detail read well on camera.
How should I stage outdoor terraces and docks for showings?
- Create clear, functional zones with proportionate furniture, keep thresholds clean, and present docks with minimal, essential pieces that highlight safe access.
What is the staging timeline for a luxury coastal listing?
- Plan 1–2 weeks for assessment and logistics, 1–3 days for install, then schedule photography with golden-hour and twilight windows, plus ongoing maintenance.
How do you handle staging during hurricane season on Jupiter Island?
- Remove exterior soft goods and fragile décor before storms, follow a storage plan, and coordinate resets around weather windows and showing schedules.